|

|

|
|
|
|
Introduction
|
|
VolRendering is a tool to visualize CT and MRT scans.
Orthographic views from front, top and side as well as
perspective views on the dataset are available. It is based on
the paper Display of Surfaces from Volume Data from Marc
Levoy [1].
|
|
|
|
|
Graphical
User Interface
|
|
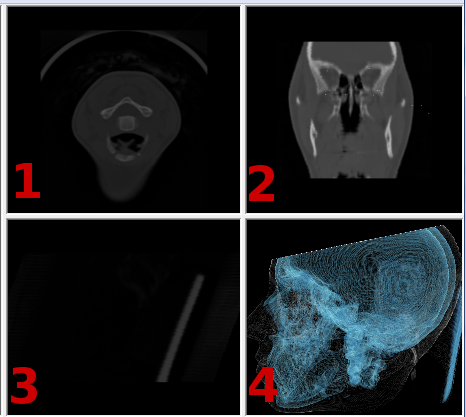
The main window is split up into four view sections,a
control panel and a main menu.
|
|
|
Main Menu
|
|
File
Open: Opens a volumetric dataset
Save Image: Saves an image of the perspective
view. Width and height of the image must be entered.
Exit: Closes
the program.
Transfer
Function
New Transfer Function: The
currently active transfer function is cleared
Load Transfer Function: Loads
a previously saved transfer function. The active transfer
function is overwritten.
Edit Transfer Function: Opens
the ->transfer
function editor
Save Transfer
Function: Saves
the active transfer function into a file.
|
|
|
|
View Section
|
|

The four view sections are:
Top View
Front View
Side View
Perspective View
Double-Clicking with the left mouse button on a viewport
maximizes it. Double-Clicking again with the left mouse
button restores the original view.
The object in the perspective view can be rotated by
clicking with the left mouse button in the perspective window
and moving the mouse while the mouse button is pressed.
Pressing the right mouse button and moving with the mouse
zooms the object.
|
|
|
|
Control Panel
|
|

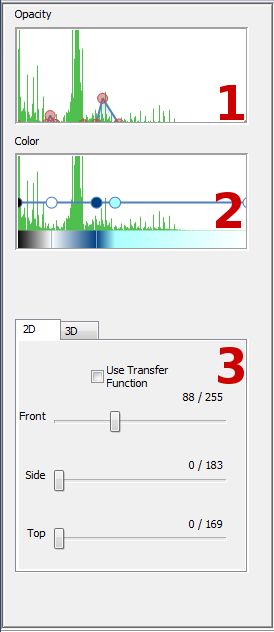
The control panel shows the
currently used transfer function (1 and 2) and parameters for
2D (orthographic) and 3D (perspective) view.
2D
(Orthographic)
3D
(Perspective)

- Use Shading: Activate
Gouraud shading for the perspective view.
Use Shadows: Shadows
on the object are displayed
Steps: Number
of raymarching steps through the object
Shadow Steps: Number
of raymarching steps for shadow calculation
|
|
|
|
Transfer Function Editor
|
|

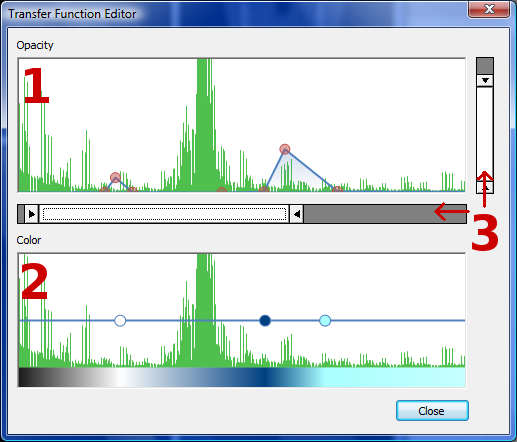
Opacity Editor:
Edit
window for the opacity values of a transfer function
Color Editor: Edit
window for the color gradient values of a transfer function.
Zoom: Horizontal
and vertical zoom of the transfer function.
Using
the Editor
Double
Clicking with the left mouse button adds a new opacity or
color point. Use drag & drop with the left mouse button on
a point to move it around. Clicking on a point with the right
mouse button deletes it. Double-Click on a color point opens
the color dialog and a new color can be selected for that
point. The first and the last point are fixed and cannot be
moved or deleted, except the opacity value for the first and
last point can be set.
|
|
|
|
|
|